Tuesday 8 December 2009

[Code] Delphi Copying To and From TRichEdit

At work we have been looking at providing basic text editor facilities to some of our users.
After looking for some third party components we decided to use the built in Win32 palette TRichEdit component instead.

Below is the code we used to insert Rich Text Format text from a database blob field into a TRichEdit component.

try
MS := TMemoryStream.Create; try TBlobField(CdsXXXReason).SaveToStream(MS);
MS.Position := 0;
RichXXX.Lines.LoadFromStream(MS);
finally
FreeAndNil(MS);
end;
And then the code to save Rich Text Format text from a TrichEdit component to a database blob field
MS := TMemoryStream.Create();
try
CdsLabComment.Edit;
RichLabComment.Lines.SaveToStream(MS);
MS.Position := 0;
CdsXXXReason.LoadFromStream(MS);
CdsXXX.Post;
CdsXXX.ApplyUpdates(0);
finally
FreeAndNil(MS);
end;
Finally we needed to send the Rich Text Format text from the database to a word document.
MS := TMemoryStream.Create;
SlRichXXX := TStringList.Create;
try
TBlobField(CdsXXXReason).SaveToStream(MS);
MS.Position := 0;
SlRichComment.LoadFromStream(MS);
StrXXX := SlRichXXX.GetText;
RTFtoClipboard( StrXXX, StrXXX);
AppWord.Selection.Paste;
finally
MS.Free;
SlRichXXX.Free;
end;
Below is the required RTFtoClipboard procedure.
procedure RTFtoClipboard(txt: string; rtf: string);
var
Data: Cardinal;
CF_RTF : Word;
begin
CF_RTF := 0;
with Clipboard do
begin
CF_RTF := RegisterClipboardFormat('Rich Text Format');
Data := GlobalAlloc(GHND or GMEM_SHARE, Length(rtf)*SizeOf(Char) + 1);
if Data <> 0 then
try
StrPCopy(GlobalLock(Data), rtf);
GlobalUnlock(Data);
Open;
try
AsText := txt;
SetAsHandle(CF_RTF, Data);
finally
Close;
end;
except
GlobalFree(Data);
end;
end;

Hope this helps someone

Monday 30 November 2009

[Tip] Remove Password from Office 2003 document

At work we needed to get into change a password protected word document of which everyone had forgotten the password. To do this my colleague found a great tip for removing passwords.

Here it is

1) With the document open press F11 while holding down shift and alt (Alt-Shift-F11). This should launch the script editor in Word.

2) Next select the find option (or hit ctl-f), and run a find for the word "password." This should highlight something like this "32943208".

3) Delete the letters and numbers between the tags (in the above example this would be the 32943208).

4) Save the document in the script editor and close the window. You should now be back in your Word document.

5) From the "Tools" pull down menu, select "unprotect." Your document should now be unprotected.

This should work the same way for Microsoft Excel.

Great tip thanks to Ashley Kozaczek.

Saturday 14 November 2009

Sql Server 2008 Database Mirroring - Cannot Create Endpoint

We have been testing SQL Server 2008 for a while now. This weekend was the date set to move our main database to SQL Server 2008 and also create a mirror on original SQL Server. We did a side by side install of SQL Server 2008 on the original server, which had SQL server 2005 on it.

The move to SQL Server 2008 went fine. I did a database copy form SQL 2005 to SQL 2008 on both the principal and the mirror instances. I then made a backup of the database from the principal instance and restored it to the mirror in recovery mode. Then I did a log backup on the principal server and restored it to the mirror database and still left it in recovery mode.

Finally it came to setting up the mirror. I used the wizard and got all the way through. Between it cam to starting the mirror an error showed up stating that the end point on the original server couldn't be contacted.

Firstly I thought that there was a firewall issue. However on checking I found that Windows firewall was switched off on both server.

Then I realised the issue was to do with the fact that mirroring had originally been enabled on the mirror servers SQL 2005 instance. I had gone through all mirrored databases on SQL 2005 instance and removed all mirroring but some where SQL 2005 was still keeping hold of the default 5022 endpoint.

After a bit of Googling and "Books On Line (ing)" I found two SQL statements that showed the problem when ran on the master database.


SELECT *
FROM sys.tcp_endpoints t

SELECT *
FROM sys.database_mirroring_endpoints e


The two statements show mirroring endpoints for an instance.

I had to delete the lines related to mirroring on the SQL Server 2005 instance. Once this was done I was able to successfully start mirroring on SQL Server 2008 instance for our databases.

As with anything like this it is advisable to take a backup of your system before manually changing the master database

Friday 6 November 2009

Create ICA files (The easy way)

Citrix Splash Screen
At work we sometimes need to give users access to programs that are installed on a subset of the Citrix servers. We have always done this by creating an ICA file of the application.

The usual procedure was:

  • Log onto Citrix Web Interface browse to the correct application
  • Right click on the application icon
  • Click 'Save Target'
  • Save the ica file somewhere it can be found.
  • Open the ica file in notepad
  • Edit the line that say removeicafile=yes to removeicafile=no (so that the file isn't deleted after the first run).
  • And finally run the application

In XenApp it is a bit easier.

The procedure is as follows:

  • Open Access Management Console
  • Drill down to the application, fro which, you want to create ICA file.
  • Right click on the application icon
  • Choose All Tasks -> Create ICA file.
  • In the box that appears un tick the check box (if internal connection) and browse to a file location to save the file.

This file will be ready to deploy to the user.

Hope this helps someone.

Thursday 5 November 2009

Beautiful Code - Trailing zeros

Sometimes during the course of a day you come across something that makes you see how beautiful programming can be.

For example I was looking for a way of adding trailing zeros to a string however the string was variable length between one and five characters long and had to be a total of six characters long. Adding a set number of zeros wouldn't work because the variable length of string.

After a bit of searching I found the following beautiful code:

http://www.experts-exchange.com/Microsoft/Development/MS-SQL-Server/SQL-Server-2005/Q_22707417.html

UPDATE SomeTable
SET SomeColumn = LEFT(SomeColumn + '000000', 6)

This code sets SomeColumn to be atleast 6 characters long by concatenating SomeColumn with six zeros. Then you chop off all characters except the first six characters using 'left' and you have the correctly formatted result string.

I think this is a beautiful way of adding trailing zeros to a string.

Please share your beautiful code

Wednesday 28 October 2009

PC to Thinclient - Case Study

We have been running a Citrix Presentation Server / Xen App interface for about 3 years. One of the main reasons for moving to a Citrix environment was cost. Three to four years prior to our Citrix conversion we had bought a load of computers and it had come time to replace these. So one of the main benefits that we could see for moving to Citrix was that we could convert the PC's to thin clients and continue to use them until they physically die. On this front I was charged with investigating the best way of converting PCs to ThinClients.

The main criteria were as follows:

1. Must be cost effective.
2. Easy to configure
3. Easy to deploy
4. Good user experience.

Some of the options I investigated were an Ubnutu install with Citrix Client software builtin, Knoppix with Citrix Client software built in, 2X software, a cutdown WinXP or Win98 install with Citrix Client builtin and Thinstation. Early on we realised that installing the Citrix Client onto various Operating Systems would get us up and running fairly quickly but would would add or keep some of the drawbacks of our current setup. For example if we reinstalled a cutdown WinXP version onto our PCs then we would have to continue to manage Updates and AV on the PCs. If we went for a linux based operating system then we would have to learn a new operating system, keep it up to date and firgure out how to configure the Citrix Client on linux. Any support or configuration on the Thin Client side would mean that we had less time to concentrate on configuring the citrix server. We are a small IT department so we required a low maintanence solution. So we narrowed it down to 2X ThinClientServer or Thinstation.

Information from 2X website

2X ThinClientServer makes the move to thin client computing easy by delivering a solution to convert existing PC’s to thin clients and centrally manage thin client devices from any vendor (HP, Neoware, Wyse, Maxspeed and more). User's connection & device hardware settings (RDP / ICA / NX, screen size, Applications that users have access to, Terminal Servers and VMware virtual desktops) can be controlled centrally by device, user, group or department (Active Directory / Local Accounts) via the web-based interface.

All in all 2X is a very comprehensive product and it would do everything we require. We downloaded a trial version and played with it for a week or so. We found that it was easy to administrate however we had great difficulties in deploying the software to most of our pc's, we tried various methods but it just didn't like our network.

So we were down to Thinstation. The only reason we had got found out about Thinstation was because a sales man had stated that we could use a linux boot cd to convert a normal pc into a thin client. We found Thinstation and began working with it. I had some experience of Linux so I looked into configuring Thinstation.

From Thinstation website

Thinstation is a basic and small, yet very powerful, Open Source "thin client" operating system supporting all major connectivity protocols: Citrix ICA, NoMachine NX, 2X ThinClient, Microsoft Windows terminal services (RDP, via RDesktop), VMWare View Open client, Cendio ThinLinc, Tarantella, X, telnet, tn5250, VMS terminal and SSH (No special configuration of the application servers is needed to use Thinstation).


Here is a list of pros and cons of Thinstation we have found while using it:
Pros
  • Minimal end user interaction required.
  • Free!!
  • Multiple deployment methods
  • Very small (~11mb)
Cons
  • Complicated configuration.
  • No central configuration
We use Thinstation as a boot disk on various different hardware from Intel Dell laptops to custom built AMD machines. We had to run a single configuration on all pc's as we were using a cd to boot so I had to enable most of the network and display modules in the config. (This is not recommended, read on to see why).

In our config the CD boots straight into Citrix Desktop so no user interaction is required and we setup the config to shutdown the PC 5 minutes after the user logs out. (I forgot I had left this option enabled as it didn't work in 32 bit Citrix however it started to work in 64 bit Citrix!).

Screen resolution was an issue because we couldn't modify resolution for individual users. There is a resolution menu that can be used to allow users to choose their preferred resolution however users have to choose on every boot up. This was not a good solution for us so we decided to create three different configurations for the three main display resolutions that users preferred.

The issues we have had with Thinstation are:
Thinstation not detecting the correct display resolution.
Network dropping occasionally.
Not being able to change configuration easily.
The first two points could be due to the large number of modules I had to use to accommodation our varied software although the network drop out has also happened on some HP thin clients that we use. Both issue have largely been resolved by using different graphics / network cards.

We are currently looking at setting up a Thinstation PXE server to allow PCs to boot directly from the network rather than having to boot a CD first. This should make it easier to change configuration.

Overall we have been very impressed Thinstation as it is free and seamless for the user.

Sorry for the long post but I hope it has been useful.

Wednesday 30 September 2009

[Fix] SQL Server 2008 Install causes Access Denied error

Got a new database server at work. It was preinstalled with Win 2008.

So I went about installing SQL Server 2008 on it. All looked to be installing correctly until I got the error near the end of the installation that said 'Access Denied' when finishing the install. After ending the installation it looked like most of the programs were installed. The SQL Server service was also running. However I couldn't connect to the new instance.

Tried to reinstall SQL Server 2008 but it gave the same 'Access Denied' error. I thought it was a permissions issue somewhere so I tried to give the service account and the installing account admin rights to the server. It still was giving the same error.

Finally found a knowledge base article that said that the installing account had to have Debug Programs permissions in Group Policy by doing the following steps

  1. Log on to the computer as a user who has administrative credentials.
  2. Click Start, click Run, type Control admintools , and then click OK.
  3. Double-click Local Security Policy.
  4. In the Local Security Settings dialog box, click Local Policies, double-click User Rights Assignment, and then double-click Backup Files and Directories.
  5. In the Debug programs Properties dialog box, click Add User or Group.
  6. In the Select User or Groups dialog box, type the user account being used for setup, and then click OK two times.

This looked like it would do the trick however when I navigated to the setting the add user group buttons were greyed out so I couldn't add the current user.

After a bit more thinking I thought that the setting must be in our network group policy somewhere. I set the Debug Programs permissions for the server OU but it still didn't change the setting on the new server. Finally I realised that the new server hadn't been moved to the correct OU. After moving it into the correct OU all the settings came through and the installation completed successfully

Hope this helps someone.

Please share your SQL Server 2008 Tips in the comments

Wednesday 23 September 2009

SQL Server 2005 - Backup Strategies

Over the past 5 years we have tried a few different backup strategies for our SQL Server data. This includes SQL Server 2000 onwards.

I thought it would be a good excercise to discuss our current backup strategy and how it evolved into its current state.

Current Backup Setup
There are 3 sections to our current backup strategy.

1. Full Daily Backup
2. Transactional Log Backup
3. CleanUp old backups

Full Daily Backup
A full daily backup of all databases is done in the evening. This is done by using the selection 'All user databases' in the backup job setup.

Transactional Log Backup
The transaction logs for our mission critical database are backed up every 15 minutes. The rest of the user databases have their transaction logs backed up every hour during working hours.

CleanUp old backups
Cleanup is done before evening backups and it varies depending on the database. All databases have a maximum of 5 days full backups. Most databases are have their clean up to be less than 5 days.

Transaction logs are kept for a maximum of 3 days with most databases having between 1-2 days transaction logs.

Looking at our strategy you may have some questions in you mind. I will try to provide a rational for our backup strategy.

We are using one maintenance plan to backup all user databases because using this method you can be sure that all current databases will at least have a full daily backup. Occasionally we had developers or third parties install applications with databases onto our database server without DBA's knowing. This would mean that DBA's were unaware of new databases that required backing up until they checked the server or were told about it. The occurrence of this issue have been much reduced in recent times but it does still happen.

The cleanup routine should ideally occur after a successful backup however due to space restrictions on the backup drive we have had to do cleanup before doing the evening backups.

We have a standard Mirror, Mirror, RAID-5 setup on our server. This means the OS is on 2 mirrored drives, Logs are stored on 2 mirrored drives and the MDF database files are stored on a RAID-5. In order to protect from multiple drive failure we has set our backups so that all Log backups go to the database RAID-5 partition and all full database backups go to the Logs mirror partition. This backup configuration gives us fully backed up databases in the event that a whole set of disks fails. For example if the RAID-5 array fails that we will have the logs and the database backups on the Logs drive. If the Logs disks fail then we would have the live database files and the log backups from the RAID-5 drives.

This setup isn't perfect but I believe that it is a decent real world solution to backing up our data. We are lucky that we have a large backup window were all databases have minimal usage so that we can perform backups in the evening.

Please let me know if you have any comments about my backup strategy.

Monday 31 August 2009

Using Robocopy to delete old files from folder

There are numerous occasions where you may want to keep a folder tidy and remove older files.

We needed a solution for a shared folder that we wanted to control so that users didn't use it as a lazy dumping ground for their files.

After a bit of searching I found a novel way of using robocopy to accomplish exactly what we wanted.
mkdir c:\delete
c:\robocopy.exe c:\Source c:\Delete /e /MOVE /MINAGE:14 /LOG+:c:\robocopy.log
rmdir c:\delete /s /q

This script creates a folder called 'delete'. Then uses robocopy to move files older than 14 days from the 'source' folder to the 'delete' folder. Lastly it deletes the 'delete' folder so that only files newer than 14 days is left in the 'source' folder.

Notes:
Remember to change the location of the robocopy executable, robocopy.log, your source and delete folders.
Add '/XF [filename]' to the robocopy line in order to exclude one or more files from being deleted (if required).

Original article can be found here. (Pure genius!)

Monday 17 August 2009

Fix - Interference on Image for Sky Digital Channels

SKY at nightFor the past few months we have been having problems with scrambled picture on some Sky Digital Channels. The interference on the image was similar to how the picture scrambles in bad weather.

The problem only affected certain channels including True Movies (321) True Movies + 1 (322) and Brit Asia (833). All the affected channels were free to air and it only affected them some of the time. If you ever went onto an affected channel and then changed to a different channel, then the Sky Digital box would crash. The only way to fix the problem was to reset the box at the mains. We even tried a new box but the problem persisted.

Finally we found our landline phone was affecting the picture. Our landline phone is a digital phone and some how it was affecting the picture sometimes.

We have now moved the phone away from the Sky box and the problem has been fixed.

Hope this helps someone.

Thursday 6 August 2009

System.IO.FileloadException error

At work we had an issue when trying to deploy a .Net 3.5 application to servers.

It would work correctly on all our development machines but when we deployed it to the server the process would show up in Task Manager but then disappear.

We found an entry in the Event Viewer as shown below

----------------------------------------------------------------------------------

Event Type: Error
Event Source: .NET Runtime 2.0 Error Reporting
Event Category: None
Event ID: 5000
Date: 06/08/2009
Time: 11:29:34
User: N/A
Computer: XXX
Description:
EventType clr20r3, P1 xxx.exe, P2 1.0.0.0, P3 4a7aaf1b, P4 xxx, P5 1.0.0.0, P6 4a7aaf1b, P7 9a, P8 f, P9 system.io.filenotfoundexception, P10 NIL.

-------------------------------------------------------------------------------------

We found that a system.io.filenotfoundexception means that the application cannot find a dll / assembly of some sort, but we didn't know the name of the dll or assembly. After a bit of digging (http://stackoverflow.com/questions/295161/) we found that we could catch exceptions when the main form is loaded in (Program.cs) as below:

try
{
Application.Run(new MainForm());
}
catch (Exception ex)
{

MessageBox.Show(ex.Message);

}


When we ran the application on the server we got an error
The error showed that the ReportingServices dlls were the wrong version. We had copied 2005 (version 8.0.0.0) dlls into the application folder, but our application required 2008 (version 9.0.0.0) dlls.

Hope this helps some one

Thursday 30 July 2009

Personal Data Storage using 'My Important Info' - Secure Wiki

The key insideMy Important Info can be used to store your important computer related information, all in a secure, self contained website. The one file website can be saved on your computer, to a usb flash drive or to your web space so that you have secure access to your important information where ever you are.

Examples of use could be to store:
  • Network device ip addresses
  • Website log on details
  • Software log on details
  • Computer log on details

How to get started with My Important Info:

  • Download 'My Important Info' to a location on your computer.
  • Open downloaded document in your browser.
  • Click on 'unlock vault' to start adding to 'My Important Info'. Default password is 'password' (without quotes)
  • Click on 'set password' to set a new password
  • Click on the menu items on the left to add new details
  • All types of information use the title section to store the name of the device, website or software.
  • Examples of titles could be Router, Server, OperatingSystem or Computer

'My Important Info' is based on a customised version of TiddlyWiki.

Let me know what you think by leaving a comment

Friday 10 July 2009

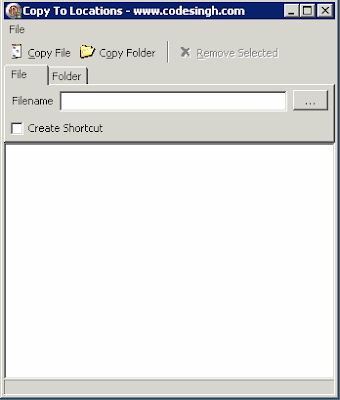
CopyToLocs - Copy files or folders to multiple locations

***UPDATE - 2010-01-25***
File locations can now be added to the 'large white box' by right clicking on the box and choosing 'paste'. Any copied file locations will be inserted into the box.

An example of the format for file locations is as follows:

C:\Documents and Settings\sony\Desktop\andreas01
C:\Documents and Settings\sony\Desktop\drupal-5.12
C:\Documents and Settings\sony\Desktop\jquery
C:\Documents and Settings\sony\Desktop\marinelli
C:\Documents and Settings\sony\Desktop\NotepadCodeLab

If the above lines are copied then they can be successfully pasted into the 'large white box'.

This method will not check for the validity of locations.
*** End of UPDATE***

At work we have 5 Citrix servers with identical software on them.

In order to keep them identical we have to replicate any changes we make to all servers. For in house software updates, we have to copy executables and required folders to all servers when we make a change to our software.


To make such updates easier I have developed a program called CopyToLocs. This is a standalone executable that will run on any Windows XP or above computer and will allow you set a source file or folder and a number of destination folders. When the program runs it will copy the file or folder into all the destination folders. You also have the option to create a shortcut to a file, with a custom name, rather than copying the file to destination folders.

You have the ability to save your source file / folder path and destination folder setting to an configuration file. This will allow you to repeat copy jobs easily.

Using CopyToLocs

  1. Download the program zip file.
  2. Extract the executable to a location on your computer / usb stick
  3. Double-click the executable to run the program.
  4. There are two tabs to choose from. One is labelled 'File' and the other is labelled 'Folder'.
  5. Choose the relevant tab
  6. Click on the elipses (...) button to select the file or folder name.
  7. If you require to copy a file or folder as a short cut tick the box labelled 'shortcut' and enter a name for the short cut.
  8. Drag and drop, into the large white box, any folders that you would like to be destinations for the source file / folder.
  9. Click on copy file or copy folder to start the process.
  10. [optional] Click on File -> Save to save the setting for you file / folder copy.
  11. To load the saved settings click on File -> Load and navigate to where your settings are saved.

This software is free to use and doesn't come with any warranty. Remember that you can always donate

If you have any comments or questions then please leave them in the comments section.

Wednesday 1 July 2009

AutoFTP - Automatic FTP file upload application

One of my clients required an easy way of uploading a folder full of files periodically. So I created AutoFTP.

Download AutoFTP here.

AutoFTP


What is it?
AutoFTP is a windows XP or above application that allows adhoc or scheduled uploading of files from a local source to an FTP server folder. AutoFTP requires the use of windows built in Schedule Task program to enable scheduled uploads.

Installation
Simply download AutoFTP and extract the zip file to a location on your computer. The folder has three files in it.

AutoFTP.exe
AutoFTP.ini
log.txt

To start the program click on AutoFTP.exe. AutoFTP.ini is a configuration file and log.txt has log entries every time the program is run.

How does it work?
Simply enter your ftp hosts address, your ftp username and password, the path to your local file store, the path to your remote files. Tick auto start if you want to automatically start the upload process when AutoFTP is started or leave auto start unticked if you want to do ad hoc uploads.

For ad hoc uploads simply click on 'Upload Data'.

In auto mode, AutoFTP will silently upload data as soon as it is started and then automatically close. To disable auto mode you will have to edit the the configaration file called AutoFTP.ini . All setting can be changed in the configuration file. The property called 'Automagic' should be set to 0 (zero) to disable auto mode.

Please note:
The source folder can only contain files. If it contains sub folders then AutoFTP will not work. I am working on solution to this issue and will post and update when I have a solution.

Please leave comments if you are using AutoFTP or if you have any problems with the application

Monday 22 June 2009

[Fix] Ubuntu 9.04 Loading Error

Stock Animation Floppy Disk LoopWhile starting up a bootable USB drive for Ubuntu 9.04 I got the following error

end request: I/O error dev fd0 sector 0


After a bit of searching I found that the reason for the error was that Ubuntu 9.04 thought that there is a floppy drive installed on my system. I had to disable the floppy drive in the system bios. After this Ubuntu 9.04 booted through correctly.

Sunday 14 June 2009

Tip - Shutdown Windows from Remote Desktop session

6 May - Time to go..
By default windows xp only allows Remote Desktop session to 'Log off' or 'Disconnect'.

I normally remote desktop onto my main machine from a laptop and then do my work on my main machine. I often need to restart or shutdown my main machine. Being lazy, I always want to restart from my remote session rather than having to go upstairs just to shutdown the man computer.

I have found that I can close all my applications then then press ALT+F4 to bring up the shutdown prompt in order to shutdown or restart my computer.

The other way to shutdown or restart from a remote session is to right click on the taskbar and choose 'Task Manager' from the popup menu. Then choose Shutdown -> Shutdown or Shutdown -> Restart from the menu bar.

Hope this helps someone be lazy!

Walkthrough - Install Win XP by booting through PXE

My brother has an old Fujitsu Siemens b series lifebook (B2175). (Probably one of the first netbooks). It had Win 2000 on it initially then we installed Ubuntu on it. Now we wanted Win XP on it as we had increased the memory in it.

Problems

The B2175 doesn't boot to USB, it doesn't have a floppy drive and it doesn't have a CD drive.

The only way to install anything on it is through PXE.

Solution

  1. Download my custom zip file package. It contains everything required to install Win XP through PXE except for the Win XP installation files ;-)
  2. Unzip the file to C:\ drive. After unzipping you will have a folder called 'root' and a file called smartdrv.exe on the c drive.
  3. Copy the i386 folder from your windows xp cd to a folder that is shared on your local network. In my case I copied the i386 folder to \\xpcomputer\video .
  4. Copy the file smartdrv.exe from c:\ to your share folder i.e. \\xpcomputer\video
  5. In the root folder there will be a file called 'Tftpd32-3.33-setup.exe'. Run the file to install a TFTP server onto you computer.
  6. After installing the TFTP server. Start the TFTP server.
  7. Change current directory to 'c:\root' in the TFTP server program
  8. Under DHCP Server tab set the following (assuming your router's ip address is 192.168.0.1):
    ip pool starting address to 192.168.0.40
    Size of pool 10
    Boot file pxelinux.0
    WINS/DNS Server 192.168.0.1
    Default router 192.168.0.1
    Mask 255.255.255.0
  9. Click save and then choose the 'settings' button and make sure that 'PXE compatibility' is checked.
  10. Now boot the destination machine into PXE. After PXE boots up you should see the following screen. Choose 'network boot' and press enter.


  11. On the next screen choose option number 2 - boot with emm386 (max memory). (I tried option 1 but this caused the windows xp setup to fail with the message 'not enough memory' on my system).
  12. After some more loading text, you will get to the following screen. You must choose 'Config' before the 10 second countdown.

  13. On the next screen choose 'Global' from the list of choices. This will let you alter host settings that will be required later on.

  14. On the next screen choose 'Lmhosts'.
  15. Click 'Ok' on the warning message you receive as it is not applicable to our situation.
  16. In the next screen you can edit the systems host file. This is where you can define the ip address and the name of the server where the windows installation files are held. This is important as without these settings the system will not be able to see the server. Please note that in this example there is a [tab] between 192.168.0.225 and xpcomputer.
  17. Save the file by typing ALT+X and click 'back' and then 'exit' on the next screens.
  18. Now we need to go back into the setup to allow the system to finish its network settings. This is done by typing in 'msnet' at the prompt as below and then clicking 'Ok' on the screen after
  19. You will now see 4 prompts which should disappear one by one with default settings. The last of the 4 prompts is titled 'Network Identification'. You will need to click 'Ok' to accept the default settings on this prompt. After this you will be prompted for a password. Just press [enter] for a blank password.

  20. Now type 'msnet' at the prompt and choose 'map' to go into the network drive mapping utility.
  21. In the 'Map drive' prompt type in a drive letter and type in the network path of where the windows i386 folder is located. Click 'Ok'
  22. Click on exit to go back to the command prompt. Make sure it says 'The command completed successfully' to confirm that the network drive was mapped correctly.
  23. Now run smartdrv.exe from the mapped drive by typing in z:\smartdrv.exe at the command prompt.
  24. Next start the windows xp installation process by typing in z:\i386\winnt.exe .
  25. On the first screen of the windows xp installer it will ask for the location of the installation files. Make sure that this shows z:\i386
  26. Now you can continue with the windows xp as normal.
Please note:

I have run this setup on a home network with normal settings. I wouldn't set this up on a corporate network unless you know what you are doing as the TFTP server may interfere with DHCP settings or other settings.

I referenced the following page in order to create this walk through.
http://r00tsecurity.org/forums/index.php?showtopic=9338

If you have any comments about this walk through or are having problems then post a comment.

Sunday 7 June 2009

How Tetris makes you feel old

tetris is the world
I just read that Tetris is 25 years old this week. I thought I could share my first memories of Tetris.

It was circa 1987 and my cousins had just upgraded from their Commodore VIC 20 to a brand spanking new 286 IBM Compatible PC. I don't remember much about the machine except for the fact that it had Jimmy White's Snooker game on it and more importantly it had Tetris on it.

To be honest it wasn't love at first sight. I looked at it and used the simple control system to try it a few times. Then I went back to playing the snooker game. A few hours later I was bored of the snooker game and started to play Tetris again. That was when the addiction started whenever I went to my cousins house I would be straight on to the PC and playing Tetris.

It wasn't long until I had my own version of Tetris. This was a time when the world had gone Tetris crazy. I remember Tetris t-shirts, a pop song and numerous clones on various platforms.

That was my memory of Tetris. What are your memories of Tetris?

Tuesday 2 June 2009

Out of system resources in Citrix Environment [Fix]

Oil Reserves in DoubtOver the past few months we have been struggling with a problem that was affecting users who were running a particular application on our Citrix servers.

The symptoms were a message saying 'out of system resources' in the application and general slowness of the session. Users couldn't save their work in the application until we reset their session although sometime the application would come back to life if we closed all other applications in the users session.

We never saw the error on Windows XP systems when user were not on Citrix.

When we asked the 3rd party developers about the issue, they said that they had never seen the error but it looked like a memory issue.

All the Citrix server are 64bit servers with atleast 16GB of memory. When monitoring the system we found that the maximum memory usage throughout the day was around 10GB.

We finally narrowed the problem to the allocation of memory per session and started to research this area. Finally we found a registry setting called SessionPoolSize under HKEY_LOCAL_MACHINE\SYSTEM\CurrentControlSet\Control\Session Manager\Memory Management. This setting was initially set to 32Mb on all our Citrix servers all the literature on the web stated that 64Bit servers should have a value of atleast 64Mb by default.

We increase the value of SessionPoolSize to 64Mb and noticed that there was a reduction in helpdesk calls relating to the dreaded 'out of system resources' error. We increased the value to 128Mb and then 256Mb. Since the change we have had no 'out of system resources' and things look promising. We will probably see how it goes for the next week just to make sure that everything is ok.

The webpage that helped us find the solution is http://support.microsoft.com/kb/840342

It seems that applications that have a large graphical foot print are most likely to affect the session pool size. Some examples are powerpoint and image manipulation programs. In our case it wasn't a graphical programs but a large database application with many complicated forms with numerous text boxes and dropdown boxes.

I really hope that this post helps someone as this problem was a major headache for us.

Monday 1 June 2009

Slow Network File Access [Fix]

Tortoise crossing

At work we suddenly started to get complaints of slow network access to files on our windows.

The symptoms were documents taking about 1 minute to open when double clicked and slow displaying of properties when right clicking and chosing properties.

One strange thing was that if you opened the same documents from inside the application itself then the documents opened as quickly as normal. Also it didn't matter whether the network location was a mapped drive or if the user browsed to a network location. Both ways were slow.

We finally found the solution when we came across a post here

So on the computer that was having issues we ran

netstat -a

in a command window.

Then we quickly double click a document on a network share that was opening slowly.

We then waited for the command window to finish running the command. Once finished we looked for SYN_SENT at the end of a line.

When we found the entry we looked for the network computer name in the entry. When we pinged the name of the computer we found that it wasn't responding.

Next we looked through the registry for the offending name and found that it was being referred to a few times.

There were multiple references to the computer in the location of an illustrator executable but I'm not sure this is relevent

When the entries were deleted all documents that were double clicked opened up straight away.

Thanks to HowToTroubleshoot

Motivate Me - Free Application

Download Motivate Me

The free application 'Motivate Me' has been updated to version 1.1 with the following changes


v1.1
----
Ability to delete a phrase
Ability to delete all phrases
Standardised buttons
Now can fully exit from properties form menu
Randomise optional

What is it?

Motivate Me
is a FREE application that sits in you notification bar and periodically pops up with configurable random phrases or messages to keep you motivated. Motivate Me can also be used to aid revision for students, a timed question and answer system or any other situation where you need to remember facts or phrases.

Reason for creating the application?

I felt motivated to create Motivate Me application because of an article I read on Lifehacker.com. The article showed how a person had created a wallpaper with messages on it used to motivate people. The problem I saw with the wallpaper method was that the average computer wallpaper is cover up with programs most of the time so a user would not get the full benefit of the messages.

In order to combat this shortcoming I thought it would be useful to create an application that would take the motivational messages and show them periodically on a pop up box. I tried to make the pop up box similar to an outlook 2003 new mail notification box.

As I was developing Motivate Me I realised that the premise of periodically notifications could be applied to a number of situations.

Some examples I thought of were:

  • Revision aid for students who must remember facts.
  • A daily reminder system.
  • A timed question and answer system.

How to install?

Download the zip file. The zip file contains 3 files. Extract all files to a location on your computer.

Once extracted double click on MotivateMe.exe to run the application. You will notice a red and white star icon appear in the notification area ( near the clock on you taskbar).

How to setup?

In order to setup Motivate Me to your liking right-click on the Motivate Me icon in the notification area. Then click on 'Properties'. The window below will appear.


In this window you can do the following:

  • Change the title of the popup notification box.
  • Change the interval between messages in minutes.
  • Change the number of second the message will stay on screen in seconds.
  • setup all the phrases that you want to appear in the notification area by adding to the phrases grid.
  • At the top of the window there are a series of buttons.
  • The save button (tick icon) saves any changes you make to the properties of Motivate Me.
  • The pause / resume button (double vertical line icon) toggles between stopping and starting the notifications.
  • New to version 1.1
  • The ability to delete phrases has been added. This is achieved by selecting the phrases you want to delete and then clicking on the Delete Phrases button (red circle icon).
  • All phrases can be deleted by clicking on Edit -> Delete All Phrases in the menubar.
  • In version 1.0 phrases were chosen at random from the list. Now you can optionally change the behaviour so that phrases are shown in the order you enter them on the properties page. Randomise behaviour is toggle by clicking the Randomise button (lightening icon)
Motivate Me will continue to run in the notification area until you right-click on the Motivate Me icon and choose 'Exit'.

What does the notification look like?

Here is an example of a notification


Comments / Suggestions

If you have any comments or suggestions then please leave a comment. I will try to respond as soon as possible.

Sunday 31 May 2009

Motivate Me - Free Application Version 1.0 [Archived]

**UPDATE - A newer version of Motivate Me is available**

Below is for reference only

Download Motivate Me

What is it?

Motivate Me
is a FREE application that sits in you notification bar and periodically pops up with configurable random phrases or messages to keep you motivated. Motivate Me can also be used to aid revision for students or any other situation where you need to remember facts or phrases.

Reason for creating the application?

I felt motivated to create Motivate Me application because of an article I read on Lifehacker.com. The article showed how a person had created a wallpaper with messages on it used to motivate people. The problem I saw with the wallpaper method was that the average computer wallpaper is cover up with programs most of the time so a user would not get the full benefit of the messages.

In order to combat this shortcoming I thought it would be useful to create an application that would take the motivational messages and show them periodically on a pop up box. I tried to make the pop up box similar to an outlook 2003 new mail notification box.

As I was developing Motivate Me I realised that the premise of periodically notifications could be applied to a number of situations.

Some examples I thought of were:

  • Revision aid for students who must remember facts.
  • A daily reminder system

How to install?

Download the zip file. The zip file contains 3 files. Extract all files to a location on your computer.

Once extracted double click on MotivateMe.exe to run the application. You will notice a red and white star icon appear in the notification area ( near the clock on you taskbar).

How to setup?

In order to setup Motivate Me to your liking right-click on the Motivate Me icon in the notification area. Then click on 'Properties'. The window below will appear.


In this window you can do the following:

  • Change the title of the popup notification box.
  • Change the interval between messages in minutes.
  • Change the number of second the message will stay on screen in seconds.
  • setup all the phrases that you want to appear in the notification area by adding to the phrases grid.
  • At the bottom of the window there are two button. The pause / resume button toggles between stopping and starting the notifications. The save button saves any changes you make to the properties of Motivate Me.
Motivate Me will continue to run in the notification area until you right-click on the Motivate Me icon and choose 'Exit'.

What does the notification look like?

Here is an example of a notification


Comments / Suggestions

If you have any comments or suggestions then please leave a comment. I will try to respond as soon as possible.

Wednesday 27 May 2009

Sql Server 2008 side by side install - Reporting service error


We are in the process of upgrading from SQL Server 2005 to SQL Server 2008. We wanted to do an install of SQL 2008 side by side with SQL 2005 so that we could test databases before migrating them to SQL 2008.

When installing SQL 2008 I did a full install and choose the option to configure Reporting Services 2008 to be ready to use. This was a MISTAKE as it seems that the SQL 2008 install overwrites the encryption key used by Reporting Services 2005. when I tried to view 2005 reports it stated that the encryption key was invalid for the installation.

Luckily we had a backup of the encryption key so we restored the key and all the reports came back.

So if you are using SQL 2005 Reporting and want to install SQL 2008 side by side then don't install Reporting Services 2008.

Sites that I read daily

Here is a list of sites that I read daily (in no particular order)
  • lifehacker.com

    This is a general site for getting things done. It is updated daily with productivity downloads and great productivity tips.

  • techcrunch.com

    Inside knowledge on new startups and general information on the tech industry

  • bbc.co.uk

    I use this site for sports updates and good editorals

  • rememberthemilk.com

    Funny name and easy to use interface to create and maintain task lists. Easy to remember shortcuts.

  • delphifeeds.com

    Daily goings on in the world of delphi programming

  • hotukdeals.com


    Forum for posting great deals that you find online and offline

Friday 22 May 2009

VMWare ESXi 3.5 Server

I have just installed the free ESXi Server on an old server. First impressions are very good.

Here is what I did to set it up:
  1. Insert the CD into the server and reboot.
  2. A linux boot screen will automatically start up.
  3. After loading all setup file the the system will ask if you want to install the server.
  4. Click [enter] and then [f11] to install and agree to the license.
  5. The setup will install VMWare ESXi server. (Takes about 10 minutes)
  6. After installation you will have the opportunity to create a root password.
  7. The server will be configure with DHCP. So if the server is on the network it will obtain an ip address.
  8. Go to a windows machine on the network and type in the ip address of the server in an internet browser. You will be prompted for a username and password
  9. On the page that displays you will have a link to download Virtual Infrastructure Manager (VIM).
  10. Download the setup files and install on the windows machine.
  11. VIM Allows you to monitor the VMWare ESXi server and create / manage virtual machines.
I found using VIM very intuative. Things like making more datastores available was very straight forward.

Sunday 3 May 2009

Folder Monitor Application


I have been working on an application to monitor a folder for new files. The client required a way of monitoring for new electronic faxes and then displaying a prominent message on a monitoring computer. The message will appear on screen while the monitored folder has 1 or more files in it.

The application is called Folder Monitor and is available for Windows based computers only. There is a settings file called ProjFolderMonitor.ini. Through this settings file a number of parameters can be altered.

Below is a list of paramters that can be changed in the settings file, along with examples
Folder that requires monitoring. Program will give an error if the folder is not valid
MonitorFolder=\\server\folder\

The message that you want to display on the monitoring computer
Message=Fax Waiting

By default the message will fade in and out while there are files in the monitored folder.

FadeLow is the lowest fade level. It must be more than 0 and less than 255
FadeLow=10

FadeHigh is the highest fade level. It must be more than 0 and less than 255
FadeHigh=200

This value sets the checking interval in milliseconds
FadeInterval=100

This value sets the step of fade in / fade out
FadeStep=10

The font size of the message
FontSize=120
Install Procedure

Download the zip file of the program, there are 2 files to be unzipped. These can be store anywhere as long as both of them are in the same folder. Finally change the parameters in ProjFolderMonitor.ini to suit your needs. You must change MonitorFolder to point to a folder on your computer or your network before starting the program. The rest of the parameters have been set to valid values.

After setting the MonitorFolder parameter and starting the program, there will be an icon in the corner of the screen. You can right-click on this icon to exit the program.

If there are files in the MonitorFolder then the configured message will start to flash in the middle of the screen. This will continue until the MonitorFolder is empty.

I hope you get some use out of this program. If you use it, if you find a bug or if you want more information about it then please post a comment.

Friday 1 May 2009

Delphi 2009 - Check for Updates Crashes

Just got Delphi 2009 installed on my works computer. It is much faster than previous versions. Everything was fine except for one thing.


Every time I tried to check for updates I would get a box that showed the Updates required to be downloaded then when I said ok to start the download it would crash out with an error message. It was a bit strange because it was doing the same on a colleagues installation of Delphi 2009.


After a bit of thinking I checked my proxy settings. Our new proxy is quite restrictive and doesn't allow executables to be downloaded. After I changed proxy settings to an older less restrictive proxy the updates worked correctly.


We could do with a better error message to help with solving the issue. Other than this issue I am quite impressed with the speed and stability of Delphi 2009

Tuesday 21 April 2009

New row default values in DataGridView

I was looking for a nice way of displaying default values in a datagridview when a user creates a new row.


At first I looked at settings in the binding source but there wasn't anything that stood out. Then I looked att he table adapter again there wasn't anything I could use.


Finally I found that it was an event in dataGridView that was required. The event is called 'DefaultValuesNeeded'. It can be used to specify default values for any row in a DataGridView. It is fired when you create a new row in a DatagridView.


Below is a C# example from http://msdn.microsoft.com/en-us/library/b22t666e.aspx


private void dataGridView1_DefaultValuesNeeded(object sender,
System.Windows.Forms.DataGridViewRowEventArgs e)
{
e.Row.Cells["Region"].Value = "WA";
e.Row.Cells["City"].Value = "Redmond";
e.Row.Cells["PostalCode"].Value = "98052-6399";
e.Row.Cells["Region"].Value = "NA";
e.Row.Cells["Country"].Value = "USA";
e.Row.Cells["CustomerID"].Value = NewCustomerId();
}

Very useful and it is something I will be using a lot.

Monday 30 March 2009

[Fix] Notepad has status bar option greyed out

The issue of windows notepad not showing it's status bar had been bugging me for ages.

The status bar option under 'View' is greyed out. The status bar is very useful as it gives line numbers which I find useful when debugging html code.

I finally found a fix for it. It is quite simply fixed by turning off word wrapping under 'Format'.

Yes thats it. Just turn off word wrap.

As a bonus you can use [ctrl+G] or [Edit -> Goto] to quickly go to a specific line number, when word wrap is switched off.

Sunday 15 March 2009

SQL Server 2005 Profiler Tip

Was at a course last week and found a tip that I didn't know about before.

So I thought I should share it.

Before SQL Server 2005 the only way to compare Profiler logs and System Resource Logs (Performance Logs) was to put them side by side and then manually try to match up events. This was frustrating and annoying.

Now with SQL Server 2005 a new feature exists in Profiler 2005 that allows you to import performance logs into profiler. You can import logs by going to File -> Import Performance Data.


When the log is imported you can navigate the log by either clicking on entries in the SQL Profiler Trace or by clicking on points on the performance log graph. Both ways will synchronise the logs so that they show the system event when a sql event happened or the sql event happening at a system event.

Please note that you may have to restart Profiler if Import Performance Data is greyed out

More information can be found at MSSQLTips.

Thursday 5 March 2009

Delphi TDBGrid Add Duplicate Row

Recently I had to develop a delphi method that would allow users to select one or more rows in a DBGrid and create duplicates of the selected rows in the same grid.


The factors that made this non trivial were the facts that you had to add the rows to the same grid as the source rows, there was a auto incrementing field in the grid and some of the field had to be left blank in the duplicate rows.


Things that I had to think about


I tried to get all the values into an array. This was fine but when I tried to use the array as the parameter for Dataset.AppendRecord, I got a compile error which stated that it was looking for an Array but was given a dynamic array. So I had to change the way I did it and had to add another forloop to insert all the values from the source row to the duplicate row.


I had to move the Auto Incrementing field to the end of the the clientdataset so that I didn't have to specify a value for it. If I tried to specify a value for it or tried to assign 'null' to it, then the code didn't compile. This is the reason for -2 in the for loop.


Here is the code


procedure TFrmFoodDetails.ActionCreateSampleExecute(Sender: TObject);
var
I, J : Integer;
ArRec : Array of Variant;
begin

for I := 0 to DbgResults.SelectedRows.Count -1 do
begin
SetLength(ArRec,CdsResults.FieldCount); // set length of array to number of fields in client dataset
CdsResults.GotoBookmark(Pointer(DbgResults.SelectedRows.Items[i]));
// For loop with -2 as need to ignore 'AutoInc' field
// Double forloop one to get cell values and one to insert cell values
for J := 0 to CdsResults.Fields.Count -2 do
begin
ArRec[J] := CdsResults.Fields[J].Value;
end;
// second for loop
CdsResults.Append;
for J := 0 to CdsResults.Fields.Count -2 do
begin
CdsResults.Fields[J].Value := ArRec[J];
end;

// Remove information that will be different in new record
CdsResultsResultNum.Clear;
CdsResultsResultString.Clear;
CdsResultsValidReport.Clear;
CdsResultsPartNo.Clear;

// End insert
CdsResults.Post;

// Remeber to release resources
ArRec := nil;
end;
end;


This may not be the best way to do it but it worked for me. If you have any comment s then let me know

Wednesday 4 March 2009

Budget Media centre Setup - Part 2 - Media Centre Software

This is the final part of a two part article. In Part 1 I talked about the hardware and operation system that I chose for my media centre and the reasons for the choices.


In this part of the arcticle I will be talking about the media centre software that can be used to control your media.


The options that I looked at were.

  • Vista Media Center
  • Media Portal
  • Sesam


Vista Media Center
I was optimistic in trying Vista Media Center on my media center (Laptop with 1.6 AMD Processor, 512Mb RAM, 20Gb Hard Drive). It really was too slow a machine to cope with Vista. Even so I was impressed with what I saw of the software. It seemed very slick. I don't know who copied who but it looks similar to the PS3 interface with items on two axises. I have had a play with Win XP Media Center 2005 and it is a big improvement on the older version.


Media Portal
I had to go back to Win XP from Vista so I looked around for some free media centre software. The first one that came up from my searching was Media Portal. I remember looking at this before but at that stage it was very buggy and didn't work correctly. The current version of Media Portal is 1.0.0.0 so I was optomistic that it would be more stable. It started off promisingly, the interface was slick very useable. On startup it came up with an error stating that the VRM 9 version was outdated. Eventually I found out that it was due to not having Win XP SP3. After installing Win XP SP 3 the error disappeared. When using Media Portal it came up with some other strange errors. When I looked on their forum it stated that installing .Net Framework 2.0 and 3.0 may fix the problem. I reluctanctly installed both frameworks. Unfortunately Media Portal continued to be unstable. Maybe it was the hardware I was trying it on but there was something intrinsinctly buggy and unstable about Media Portal which made it unusable for me. This is a pity because Media Portal did seem to have most if not all the features that I required.


Sesam
This is an old media server that I have also looked at before. It looks a bit old fashioned but worked really well. The interface is very slick and it is the only media centre that I have seen that can be controlled exclusively using four arrow keys and the ok button on a remote. This may seem like a small issue but when your using a remote and have to use the mouse for certain functionality then it quickly becomes frustrating.


Conclusion

My system maybe a special case as it is quite a low specification but my conclusion is that media centre software should be stable and very easy to use. It shouldn't be compared to other computer software as it's usage is completely different. It should be compared to other home entertainment equipment like DVD players or Hi-Fi systems. So would you be happy if you had to use a mouse to get to certain functionality of your DVD player or would you be happy if you had to restart your DVD player because it was constantly crashing. In my opinion media centre software is a tool to get to your media. It doesn't need super fancy graphics, it just needs to be designed to get to your media quickly and efficiently. If you are like me then I would recommend Sesam. The only issue with Sesam is the fact that it is not being developed anymore so useful features like plugin's for YouTube will probably never happen.

Tuesday 3 March 2009

JHove Batch Processing


What is JHove?

JHove is a java utility that can be used to identify document types. It is used extensively in the digital preservation field.

The problem

At work I was set the task of getting JHove to batch process all files in a folder. It does individual documents correctly using the GUI however there were no examples of it being used through the command line on a batch of files. After looking at it for a while it seemed that we would have to build a separate application in order to call JHove for each file in a folder.

Finally we worked out how to do batch processing by using JHove alone.

Here is the batch file we created


java -jar c:\jhove\bin\JHoveApp.jar -o c:\output.xml -h audit -c C:\jhove\conf\jhove.conf "C:\Documents and Settings\DigitalArchives\Desktop\testjhove"


Parameters:-


Send the results to c:\output.xml
-o c:\output.xml


The type of output you what to have. You need to set it to 'audit' in order to do batch processing
-h audit


Use the configuration file c:\jhove\conf\jhove.conf (This is the default config file and it can be changed to specify which types of files you want to test for)

-c c:\jhove\conf\jhove.conf


The folder that contains the files to audit
"C:\Documents and Settings\DigitalArchives\Desktop\testjhove"


Improvements

Thing to improve the process are as follows

  • Allow multiple folder to audit
  • Create a front end for the process that will allow you to pick a folder to audit and choose an output file.

Please let me know if you are using JHove and how you are using it.

Tuesday 24 February 2009

Locked files on server


At work we occasionally get the issue of a file being locked when a user wants to get into the file and modify it.

The issue usually affects excel files where an excel session crashes thus causing the system to think that the file is still open. Previously we have had to wait for a server restart to unlock the file or save the file as a copy and continue working on it. Both options were not ideal. So we looked for a better way. As with most things the solution is quite simple.

Here is the procedure used to see all open files on a file server and to close them.

  • Log onto the server where the locked file is stored.
  • Right-click on 'My Computer' and choose 'manage'
  • In 'Computer Management' drill down to System Tools -> Shared Folders -> Open files
  • In the right pane there will be a list of all open files on the server with usernames and type of locking in a table.
  • Right click on the file that you want to close and choose 'close file'. Click 'ok' on the confirmation and the file will disappear from the list.
  • The file is ready to be opened again.

Friday 20 February 2009

Unwanted emails when Maintenance Plan runs

Since we setup DatabaseMail on our server at work we started to get the following kind of email whenever a maintenance plan ran.

NEW COMPONENT OUTPUT
Microsoft(R) Server Maintenance Utility (Unicode) Version 9.0.4035 Report was generated on "server".
Maintenance Plan:
Duration: 00:00:01
Status: Succeeded.
Details:
Back Up Database (Transaction Log) (server) Backup Database on Local server connection
Databases:
Type: Transaction Log
Append existing
Task start: 2009-02-20T08:30:02.
Task end: 2009-02-20T08:30:03.
Success

We had looked at all the notification setting but couldn't find anywhere that told SQL server to send an email when a maintenance plan ran.

Finally with the help of a post we found that this feature can be switch on or off by doing the following

  • Open Management Studio
  • Connect to a database server instance
  • Drill down to Management -> Maintenance Plan
  • Click on the maintenance plan that is causing the issue.
  • Click on the icon next to 'Manage Connections'. If you hover over it should display 'Reporting and Logging'.
  • It will display the window below
  • Make sure the checkbox labelled as 'Send report to an email recipient' is not check to stop the emails being sent.
  • Lastly save the Maintenance Plan.

Hope this helps someone