Wednesday 28 January 2009

History of a Linux wannabe


In this article I will try to look through my Linux past and chart which distributions I used, why I used them and why I moved on.

The RedHat days.

It was 1999 and I had just started University. In our first programming lab we were taught how to dual boot our lab PC's so that we get into our programming environment. I didn't know it but this was my first contact with the Penguin. The things that hit me initially were super high resolution, the funky desktop background, the eyes that keep on following you where ever you mouse goes and best of all the Matrix screensaver that had been installed on all the Redhat Linux desktops. We only used it in our C programming labs so the only thing I knew how to use was the text editor (emacs I think). We tried to use Netscape Navigator to get on the Web but it didn't work. I would always see great 'geeks' banging away at the keyboard and laughing to themselves but I never ventured further.
Around about the same time I went home for the weekend and my brother threw a box at me. It was a blue box with a picture of a man wearing a mac and a red hat. I looked at the back of the box and noticed that the screenshots looked like our dual boot system at Uni. My brother had and still has a knack of getting me stuff even before I know I need them. So I tried to install Red Hat on our Intel 486DX. It was so difficult to install that I have tried to erase it from my memory. I don't remember much about the install except that it kept on crashing. I remember getting finally getting it installed but it was too slow.

Getting bitten by the cheomeloan

Fast forward a few years and Linux beconded again. This time in the form of Suse. I bought the 7 CD distribution from Amazon.co.uk for about £30. Suse looked the part however as with many of the linux flavours I tried at the time, installing things was a pain. It could just have been me or the things I was trying to install but every time I tried to install anything I would be caught in depedancy hell. I wanted to beleive in Linux but everytime I tried something it wouldn't work then i had to traul the internet for answers and would get frustrated.

Linux strikes back

A few years passed, now I was working for a small IT department near Bradford. Every so often I would get an old computer thrown my way. I'm a sucker for older computers. I can always see a potential use for them. My garage is like a sanctuary for used and abused computers... Anyway I degress. So I had a few computers and wanted to setup one for my niece and nephew to play on when they got bored of the TV.

My options were fork out for Win XP and fork out again for some educational software or have a look at Linux again as it is free. I looked around for what distribution was hot. Everything pointed one way... Ubuntu. I installed Ubuntu 6.06 Dapper and most of it just worked. In my opinion this is where Ubuntu excels. It makes the initial steps of installing the operating system straight forward so that you get past the initial hurdles of a new operating system without getting frustrated.

I remember that I wasn't overwhelmed with the number of packages installed, there was office, internet, some drawing packages and thats it. As Ubuntu is based on Debian it also had apt-get, the great package management software at it's disposal.

I think apt-get is one of the major reasons that I have stuck with Ubuntu, as it make installing things so easy. By sticking with the one distribution I have managed to get used to it and gain more knowledge about Linux in general.

A special mention should be made to Debian as it is the foundation many of the most popular distributions. I have only recently installed Debian on one of my servers and it's rock solid.

My advise for people who have been frustrated with linux in the past is to keep on trying it out with different distributions. This way you will find the best distribution for your needs.

My current Linux installations

2 x Ubuntu 6.06 Server (Work)
1 x Debian 4 Server
1 x CentOS Server (Work)
1 x Edubutu 8.10 Desktop (Great for the kids and me!)

Tuesday 27 January 2009

Return of the GDrive rumours

The Register has an interesting article on the rumour history of the Google drive.

Rumours of Google offering web-based storage have been circling since 2006 when an internal presentation mentioned the GDrive.

After the most recent rumours surfaced, The guardian suggests that it could be the death nail for PC storage as we know it. However I am very specital about this. My reasons for this are as follows.

1. There is such a fuss caused by government wanting to give us ID cards and storing personal information in a database. If the government is not trusted with storing some of our data how will a private company be trusted with storing our data. This is a private company that has share holders and has to make a profit.

2. UK broadband speeds have just got 'up to' 50mb. This is only available to cable customers and only on the most expensive tarrifs. To be seriously thinking about using a 'GDrive' system as your primary storage, broadband speeds must be at 100mb or more. Just imagine trying to download a home video of the kids from the web at current broadband speeds.

3. Unless GDrive can be mapped as a conventional mapped network drive, files on the GDrive will have to be downloaded to a local drive to be viewed. This will mean the need for local storage will persist.

As with most things we will have to wait and see how it all pans out when the GDrive is released (if it is ever released!)

Sunday 25 January 2009

Home Backup Strategy - Part 3 - Automating Backups - Conclusion

In part 1 of this article we introduced the problem of having large amounts of data on home PCs without having a backup strategy.


In part 2 we discussed the options that you have when considering a backup strategy.


In the final part of this article we will look at how each option needs to be automated in order to be a fully functional backup system and then we will come to a conclusion about home backup strategies.


Humans are lazy and forgetful so if we leave it to us to make regular backups then we wouldn't have a good backup system. To be sure of a good as possible backup system we need to minimise the human factor. Most of the external hard drives, NAS devices and on-line backup systems come bundled with some type of backup software.


Bundled software will do the job but they are usually custom software for each backup device. This is why we recommend that you use free software to setup and schedule your backups. Two great examples are SyncToy and Robocopy. Both these programs can be used with any type of drive and both are easy to automate and run periodically. SyncToy is more user friendly than Robocopy but you should look at Robocopy if you want to do advanced backups.


With an automated system it is imperative that you check to make sure that it is running. You should do this as regularly as is necessary.


Conclusion


So to conclude we would recommend that an external hard drive will be the appropriate backup solution for the average home user. External drives provide the best compromise for ease of use, capacity, speed and cost from all our options. USB drives storage capacity is too small, internal drives are susceptible to the same problems as the system being backed up, NAS devices could be a valid backup system for power home users but are a bit over kill for the average user and on-line backups don't have the bandwidth to be considered for a full home system backup.


However it is still important to remember that backup destinations are only half the solution. If you don't create regular backups then even the most high tech solution will fail. Automating backup tasks is the best way to make regular backups but this needs to be monitored to make sure it keeps on working.


Backup isn't the most glamourous subject but you don't want to be in the situation where you realise how important backups are after it is too late.


Amazon link to our recommended backup device option:


Maxtor OneTouch 4 Plus 500GB External Hard Drive

Home Backup Strategy - Part 2 - Options

In part 1 of this article we looked at what problems we face when we look at backing up our personal information. We came up with the following options for our Home Backup Strategy:

  • Large USB stick
  • Another internal drive
  • External hard drive
  • Network Attached Storage (NAS)
  • Online Backup


In this part we will go through the above options and look at the strengths and weaknesses of each one.


Large Pen Drive / USB Stick / Flash Drive


The largest capacity USB drives are getting up to 64 GB so they are viable for smaller backup datasets. Many Kingston USB drives come with a 5 year manufacturer warranty so they give you peace of mind that your data will be safe for a long period of time. USB 2.0 transfer speed is very good, so backups can be made quickly. USB drrives are still on the small side for medium or large backups and as the cost per gigabyte is expensive.


Another internal hard drive


If your computer has two or more physical hard drives then one can be used as a backup of the main hard drive. The positives about this approach are that transfering backups / restores is fast. The cost per gigabyte is very low. The negatives with this approach are that the drive is part of the same system so viruses could propergate to the backup drive or other problems with the system could affect the backup drive.


External hard drive


External hard drives give you portability that it close to USB drives and the cost per gigabyte that is closer to internal drives. You can get external drives that are the same size as internal drives, so single drives are getting close to 2TB. USB 2.0 connections are slower than internal drives however the new e-SATA connection will give you SATA speed in an external unit.


Network Attached Storage (NAS)


Network Attached Storage is external storage that can be accessed from anywhere on the network and importantly doesn't need a seperate computer to work. It is a self contained unit with storage and management software built in. If you have multiple computers on your network then a NAS device can be used to centralise storage and allow all computers to access the data all the time. NAS device are more likely to have space for more than one hard drive so that redundancy can be used to protect your data further.


Online Backup


Online backups are backups that are done over the internet. It is most suitable for backing up small data sets. Online backups provide the best offsite solution as the backup can be stored anywhere in the world. However it is the slowest speed backup of the options in our list and you may have to put your data in the hands of a third party and trust them to take care of your data. Some examples of online backup over the internet are http://www.idrive.com/ and http://carbonite.com/. Both of these services have There are also rumours of Google getting into the online storage market with GDrive...


Here is a list showing the strengths and weaknesses of each option:


Large Pen Drive
+ Easy to use
+ Quite fast
+ Very portable
- Small capacity
- High cost per gigabyte


Another internal hard drive
+ Very fast
+ Large capacity
+ Low cost per gigabyte
- Not portable
- Backup not seperate from source


External hard drive
+ Easy to use
+ Quite fast (Very fast with e-SATA)
+ Portable
+ Large capacity
+ Low cost per gigabyte
- Dependant on computer to work


Network Attached Storage (NAS)
+ Independent usage
+ Very large capacity
- Not portable
- Involved setup
- Reletively expense for home use


Online backup
+ Easy to use
+ Independent usage
- Expensive
- Slow
- Third party trust issues


In part 3 we will discuss how to automate backups and come to a conclusion about our home backup strategy

Home Backup Strategy - Part 1 - Introduction

Introduction

So you've been using your digital camera for a few years now and you've been creating home video masterpieces with your digital camcorder for even longer.


Since getting an mp3 player your music collection has exploded and your not sure how many word documents and spreadsheets you have in 'My Documents'.


All this data is held on your main computer. In this situation if your computer failed you would loose all the kids photos, videos, all your music collection and all your documents. You would loose everything!


How can we stop this from happening? This is the basis of this article.


Gone are the days when burning your important data to a few CD's every so often would constitute a backup strategy. The main reasons for this are as follows:


The volume of data that we store at home has grown to hundreds of gigabytes, this is mainly due to all the media that we have on our drives.


The data on our computers is added to alot more frequently. If you think that when you copy your photos from your camera to the PC then it will add multiple gigabytes to your backup.


With these two points in mind we need to think about implementing a Home Backup Strategy.


The options that are available for backing up personal data are

  • Large USB stick
  • Another internal drive
  • External hard drive
  • Network Attached Storage (NAS)
  • Online Backup


In part 2 we will go through each option and discuss the strengths and weaknesses of each.

Friday 23 January 2009

SyncToy functionality in Robocopy

Recently I have been using both Robocopy and SyncToy for projects at work and at home. I really like the easy of use of SyncToy but sometimes it doesn't sync files for unknown reasons. It also adds .dat files to the source and destination folders which sometimes isn't desirable. The best thing about SyncToys is the GUI and how easy it is to setup folder pairs.

Robocopy is a very powerful synchronisation program. It has lots of options that you can play with and doesn't add extra files to source or destination, it is very fast, but it isn't very user friendly.

Ideally I want to have the power of Robocopy with the ease of use of SyncToy.

There are 3 options that you have in SyncToy 2.0 for synchronising folders. The 3 options are:

  • Synchronise
This is a two way synchronise where new, updated and deleted files are propergated to the source and destination folders. Use this with care as you can delete a lot of files very quickly when using this method.
  • Echo
This is one way synchronisation where new, updated and deleted files on the source are propergated to the destination folder. You could think of this as option as a one way mirror operation. This the main option when I use SyncToy
  • Contribute
This again is one way synchronisation but no deletes are carried through to the destination folder. We have used the contribute method at work where one of the departments was going out to gather information from a number of off site locations. They did this by using an external hard drive and copying files from the external location to the external drive. When back at base we have a folder on the network that is used to store all the data from all sites. We synchronised the external hard drive with the network location when we get back to base. The good thing about using contribute is that your source and destination don't have to match as SyncToy will only take new or updated files from the source and move them to the destination. So in our case we had a relatively small external hard drive and a large network drive where the data from all external sites was deposited.

So the question is how can we replicate the three SyncToy options in Robocopy.

Echo

/MIR = Copy Subfolders, including Empty Subfolders and delete all folders from destination not in source
robocopy C:\Source C:\Destination /MIR

Contribute

/E = Copy Subfolders, including Empty Subfolders

robocopy C:\Source C:\Destination /E

Synchronise

Not sure about this one as there was no switch or group of switches to that I could find to replicate this functionality. There must be a way of doing this but not sure how. You may have to run robocopy twice and swap over the source and the destination when running it the second time.


I have only just scratched the surface of Robocopy. View the full list of parameters to see how much more there is to Robocopy. For example you can log all jobs by using /LOG:filename and you can do a dummy run by using /L (Highly recommended).


Robocopy comes preinstalled with Windows Vista and can be downloaded for Windows XP / Windows 2003 for free as part of the Windows 2003 Resource Kit Tools

Thursday 22 January 2009

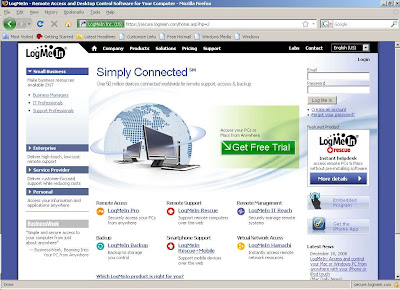
LogMeIn.com for adhoc user support

LogMeIn is a website that you can use to remotely connect to computers from anywhere in the world.

Recently I have been using LogMeIn for accessing my home computer and for ad hoc support for friends and family.


Here, I will outline the method of setting up a LogMeIn account and using the account to get on to your local computer or for ad hoc user support.


Fig 1: Open you browser of choice and got to http://www.logmein.com


Fig 2: Click create account. (Below the username and password boxes)


Fig 3: Under personal remote access choose the sign up link next to LogMeIn Free


Fig 4: Fill in the registration page


Fig 5: After registration click on Add Computer


Fig 6: Click on Download Now to install a 10mb file that will register your computer with your LogMeIn account.


Fig 7: Download the installation file and run it and click Next.


Fig 8: Read and agree to the terms and conditions and click Next.


Fig 9: Choose a name for the connection (Defaults to your computers name).


Fig 10: Choose Typical Installation and click Next.


Fig 11: Choose a location for the installation and click Next


Fig 12: Wait for the installation to complete.


Fig 13: Set up is complete.


Next go to your email and look for an email from LogMeIn and click on the link in it to activate your account.

Log on to LogMeIn.com from a different computer. Now you will see a list of computers that you installed LogMeIn on.


Fig 14: Main page after you log in. Click on a computer to remote control it.


Fig 15: Enter you normal username and password. If you don't normally log in with a password then the original LogMeIn installation will ask you for a password which will be used to access your computer through LogMeIn.


Fig 16: Click on Remote Control to get onto your computer. I would recommend that you install the addin for Firefox / IE when asked, as it makes LogMeIn alot easier to use and improves the graphics of remote sessions.


Fig 17: A successful connection to your computer


Fig 18: An example of a full screen remote session.

This quick walk through should help you easily setup remote access to your computers.

Wednesday 21 January 2009

Apps I can't live without 2009 edition ...

… or more appropriately, Apps I would find it difficult without


  1. Firefox

Google Chrome looks like a good product. However it is still in Beta and it was slow when plug in’s were involved. i.e. Flash.

For me Firefox still rules because of it’s speed, live bookmarks and it’s cross platformness (is this a word?). Although IE7 is a big improvement on IE6 (sorry for swearing!!) it still isn't as slick as Firefox


  1. Yahoo! Mail

Yahoo! has been in trouble recently, but they have an excellent mail application that displays everything just the way I like it (panes). It’s spam detection is very good. Google Mail is very good but I prefer the layout of Yahoo! Mail although it can be abit slow sometimes. I have had my yahoo email address since I was 15 (hence sugi007) and used it on and off until 2003 when I made a conscience disision to use it exculsively. I also have a google mail account which I forward onto Yahoo! Mail. (Good feature from Google). So I maybe hedging my bets for the future.


  1. Delphi 2007 / Visual Studio 2005

My main development consists of using Delphi 2007 and Visual Studio 2005 (C#). Main reasons for using Delphi would be minimal prerequisites, the clientdataset, speed of development / deploying and running. Main reasons for using C# are that you need to have C# in your skill set and it’s the standard technology at work.

  1. YouTube

Whether I’m trying to entertain the kids, looking for a tutorial or just bored. YouTube usually comes to the rescue.


  1. Sql Server Management Studio

It is the one place where I can go to query, integrate and lookafter at all my database / reporting apps.


Tuesday 20 January 2009

Ubuntu on a Stick with Persistence


Here is a quick note about issues that I faced when creating a USB version of the Ubuntu 8.10 LIVE CD.

On the face of it the process is very simple.

1. All you have to do is boot up into Ubuntu 8.10 or use the CD to boot into a live version of Ubuntu.
2. Make sure Ubuntu 8.10 Live CD is in the CD drive or download an ISO of the LIVE CD.
3. Insert a USB flash drive into a spare USB port
4. Next go to System > Make USB Startup Disk
5. You will see the screen below. If the CD is in the drive it will automatically populate the source section. If not you can browse for the iso file.
6. Your USB drive will show up in the source section.
7. Set the amount of space that you want to use to save your settings. Remember that this space will be reserved for Ubuntu and you will not beable to use it for anything else. For example if you plug the usb stick in to Windows machine it will not show the space that you reserved for the persistent file as free space.
8. Click on Make Startup disk to start the process.
9. The speed of the process will depend on if your source is CD or ISO and if you have USB 1.1 or USB 2.0 ports.
11. Reboot your computer and set it to boot to USB first.
10. This is where the process should end. However recently I have got an error when trying to boot from the USB stick.

The error states “Pen Drive Without Operating System. Remove Pen Drive And Reboot”

Troubleshoot

I did the following to troubleshoot the issue.

1. Check the USB stick to see if all the files are there. (All required files seemed to present and correct).

2. Check if the USB stick partition is set to be bootable.

This is done by the following command

fdisk -l


(It was set to be a bootable partition)

3. Next I turned my eye to the version of usb-creator that was being used.

In Terminal typed in following

usb-creator –version


This brought back the result 0.1.8. This was strange because I thought that 0.1.10 was the default for Ubuntu 8.10.

Got got version 0.1.7 deb file from Launch Pad and uninstalled current version and installed the deb file version.

When I checked the version again it said it was 0.1.5. Mmmm strange maybe the version number are different for the Ubuntu versions.

4. With version 0.1.7 installed I tried the process fo creating the Ubuntu 8.10 Live USB Stick. This time it created and booted into the usb stick as it should do. Unfortunately it didn’t persist changes after a reboot.

5. So the default version of usb-creator (0.1.10) doesn’t make the usb stick bootable and the older version of usb-creator (0.1.7) doesn’t persist changes

6. Now I was getting somewhere. I thought that the newer version was better because previously I had that working correctly with persistence. So I decided to concentrate on that. Now I needed to get this version booting correctly. After abit of googling I came across a page about creating a master boot record on a usb stick.

7. Used the following code fixed the problem.

install-mbr /dev/sdX


where /dev/sdX is the location of your USB stick

This worked a treat, I had a Ubuntu 8.10 Live USB with persistence and it is quite fast